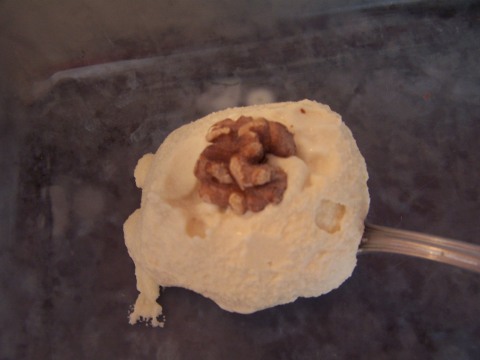
Blackberry Ice Cream
Posted on: June 7, 2010
I decided to make this flavor after a bumper crop of fresh blackberries came into all of my local grocery stores, yielding pints and pints of fresh, juicy, inky black berries on sale for only 99 cents a pint. So what to do with them all? Make tasty homemade ice cream of course! Part of the many charms of DIY ice cream is that you can make flavors that are nearly impossible to find commercially. Blackberry ice cream is one such flavor. Sure black raspberry is readily available, but do you really think it’s made with real, wholesome, honest to goodness black raspberries? In most cases I highly doubt it. Not only does the homemade kind have real, natural ingredients but the taste is superior as well. A beauty both to look at and to eat.
When I first started to make fruit ice creams, I followed certain recipes that instructed me to simply mix pureed fruit right into the ice cream base. In my opinion, I think this method yields an icy finished product. You see, water is the enemy of ice cream. Added water to your base will diminsh creaminess and produce an icy result every time. This is tricky when it comes to making fruit based ice creams because fruit inherently contains a lot of water. My solution? The quick skillet jam. By making a jam I boil the troublesome water out of the fruit while concentrating the flavors of it simultaneously. Then, right before you put it into the ice cream maker, I add a small amount of pureed fruit for freshness.
Please don’t be afraid to make a skillet jam! Trust me, it’s fall off a log simple. You just mash up the berries a bit, through em’ in a pan with some sugar and booze, and simmer over low heat until jam-like. No scary canning, sealing or boiling required. The jam won’t keep as long as a properly canned preserves would, but it you really don’t need it to. This jam is made for a higher purpose- providing sweet, sweet flavor to your homemade ice cream!
Blackberry Ice Cream is a perfect flavor for summer, and this recipe came out beautifully. The texture was actually velvety with a creamy, fruity flavor. Do think of this pretty little dessert next time berries are on sale at your local supermarket. Or whenever the mood strikes!
Blackberry Ice Cream Recipe
Ingredients:
12 oz. blackberries, divided
2 cups half and half
3/4 cup sugar, divided
3 large egg yolks
pinch of salt
½ teaspoon vanilla extract
2 tablespoons Grand Marnier liquor, or other liquor compatible with blackberries
1.) To make the easy skillet jam, combine 9 oz of the blackberries, ½ cup of the sugar, and 1 tablespoon Grand Marnier in a medium pan; bring to a boil. Reduce heat; simmer until reduced, with a jam-like consistency (about 30-40 minutes), stirring occasionally. Add in the remaining tablespoon of Grand Marnier and remove from heat. Spoon into a container; cool to room temperature.
2.) Place remaining fresh blackberries in food processor. Pulse until blended. Strain puree through a sieve to get rid of extraneous seeds.
3.) Combine half and half in a medium saucepan and set over medium heat. Heat until bubbles appear near the rim of the saucepan and steam begins to rinse, but do not let it boil.
4.) Meanwhile whisk the egg yolks together in a large bowl and gradually add the remaining ¼ cup sugar. Whisk the mixture until the yolks look fluffy and turn a pale yellow color.
5.) All the while whisking the egg yolk mixture, slowly and gradually add the half and half and when fully emulsified, pour the mixture back into the medium saucepan. Over low heat constantly mix the base with a spatula or wooden spoon until it thickens slightly and can coat the back of a wooden spoon, about 6 minutes.
6.) Immediately remove from heat and transfer to a large bowl. Add the pinch of salt, vanilla extract, blackberry puree and blackberry jam, whisking well to blend. Refrigerate 4 hours to overnight. Freeze according to your ice cream machine’s instructions. Enjoy!
Make it a sundae!
While I think this ice cream is stand alone delicious, I think it would taste lovely with a white chocolate hot fudge sauce drizzled on top. Blackberries and white chocolate are a tried and true delicious flavor combo. Emeril Lagasse makes a tasty looking white chocolate sauce here:
Beet Ice Cream
Posted on: June 1, 2010
I know- this sounds bizarre- but roll with me! Keep an open mind if you will. When it comes to ice cream, pretty much anything that has a natural sweetness to it can be made into a tasty ice cream. Sometimes the greatest flavors can come from some pretty unexpected places. For instance, sweet fresh corn ice cream was a revelation to me last year. It’s off the charts tasty, and actually incredibly popular in Asian and Latin American countries. Like corn, beets have a natural sweetness that lend themselves equally well to both savory and sweet dishes. They ain’t called nature’s candy for nothing! You can see why in this beautiful, vibrant and delicious ice cream recipe.
I have to give credit where credit is due here- I was given the courage to make this recipe by the great food blog Desert Candy. I was mulling over making a beet ice cream, but her post on Beet Ice Cream convinced me to go for it! And I’m so glad I did- her recipe is fantastic. Sweet and citrusy with a touch of earthiness.
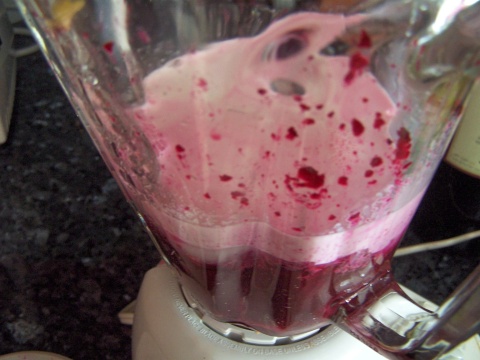
This bold and vibrant ice cream is fairly easy to make. The most difficult part is roasting the beets, and even that is pretty simple. Just wrap the beets in foil and roast until tender, peel off the skins, and then chop. Then blend the beets with orange juice, orange zest, sour cream and half and half. No custards, no cooking, and no eggs involved. Just make sure to avoid using canned beets. Roasted beets are just light years tastier and once you try them you’ll never go back to canned beets ever again.
This ice cream was surprisingly good. And it’s gorgeously hued to boot! Make it for friends and amaze their palates with this playful, whimsical dessert.
Beet Ice Cream
3 medium-size beets
1 small orange
8 oz (about 1 cup) sour cream
3/4 cup sugar
1/2 cup half-and-half
1. Preheat the oven to 400F. Wrap the beets in foil and roast in the oven until very tender, about 45 minutes. Remove, when cool enough to handle, peel beets and chop finely.
2. Place the beets in a blender or food processor. Add the juice of the small orange and about 1 teaspoon of the orange zest. Purée the mixture until you have a rough purée. Add the sour cream, sugar, and half-and-half. Purée the mixture until completely smooth and combined.
3. Press the mixture through a fine mesh sieve (optional). Refrigerate to chill the mixture completely, several hours or overnight. Churn in your ice cream maker according to the manufacturer’s directions.
Make it a Sundae!– Try this ice cream drizzled with dark chocolate hot fudge. Beets and chocolate both have a natural earthiness that compliment each other beautifully.
Kahlua Chip Ice Cream
Posted on: February 2, 2010
This was just as delicious and straightforwards as it sounds. I made a standard custard based ice cream, added kahlua to it after it finished cooking, and then after it finished churning I added dark chocolate chips. What else can I say- Yum!
So often you when you see Kahlua in ice cream, it’s automatically paired with coffee. But Kahlua has a delicious flavor all its own that deserves to be highlighted. Yes, it goes very well with coffee, but can you really taste the Kahlua flavor very strongly? I never can. So I decided to make Kahlua queen for the day and give it its own flavor. The chocolate chips enhance without detracting from the overall Kahlua flavor of the ice cream. And hey- everything’s better with chocolate chips right?
I knew a Kahlua Chip flavor would be good, and my instincts definitely served me well. This was completely delicious! A great twist on chocolate chip and a must for anyone who likes Kahlua!
Kahlua Chip Ice Cream Recipe
Ingredients:
1 1/2 cups heavy cream
1 1/2 cups whole milk
2/3 cup sugar
5 large egg yolks
pinch of salt
3 tablespoons Kahlua
½ teaspoon vanilla extract
½ cup dark chocolate chips, chopped from a bar of high quality chocolate
1.) Combine milk and heavy cream in a medium saucepan and set over medium heat. Heat until bubbles appear near the rim of the saucepan and steam begins to rinse, but do not let it boil.
2.) Meanwhile whisk the egg yolks together in a large bowl and gradually add the sugar. Whisk the mixture until the yolks look fluffy and turn a pale yellow color.
3.) All the while whisking the egg yolk mixture, slowly and gradually add milk mixture and when fully emulsified, pour the mixture back into the medium saucepan. Over low heat constantly mix the base with a spatula or wooden spoon until it thickens slightly and can coat the back of a wooden spoon, about 6-7 minutes.
4.) Immediately remove from heat and transfer to a large bowl. Add the pinch of salt, vanilla and Kahlua and refrigerate 4 hours to overnight. Freeze according to your ice cream machine’s instructions. When ice cream is ready, add chocolate chips. Enjoy!
Make it a sundae!
This ice cream would taste great with a mocha sauce drizzled on top, chopped toasted walnuts and whipped cream. Yum!
The lighter side– Feel to substitute whole milk or half and half for the heavy cream in this recipe. If anything it will only make the flavors more intense, which is the reason gelati is often made this way in Italy.
Roasted Banana Ice Cream
Posted on: January 26, 2010
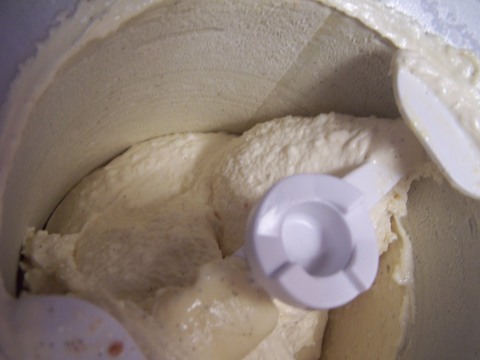
Again, I took this recipe from David Lebovitz’s masterful cookbook on all things frozen, The Perfect Scoop. Even though it uses just a bit of whole milk and a smattering of butter, this ice cream came out remarkably creamy. In fact, I think the lack of fats really allowed the sumptuous flavors of oven roasted bananas and caramelized brown sugar to take center stage. The dot of butter actually went quite a long way, combining beautifully with the brown sugar to create a sweet-salty butterscotch flavor. The members of my family on diets went wild for this recipe, and we all polished it off in one sitting.
I decided to make this when I wanted to make a new ice cream, but I didn’t have enough milk, cream or eggs to make the proper, custard style variety. Being too lazy to go out to the store, I decided to stick it out and scrounge around the house for ingredients to make some kind of frozen treat. When I saw the three bananas on sitting in a bowl on my kitchen table, I immediately remembered David Lebovitz’s Roasted Banana Ice Cream. I made it last year, and it was equally delicious then as it is now.
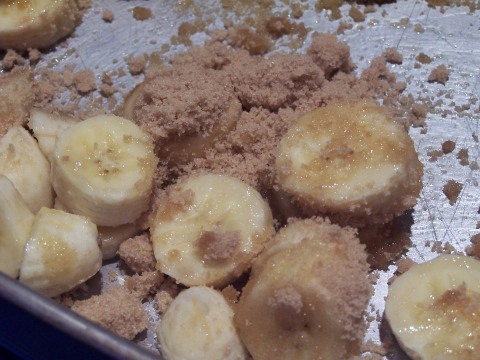
This ice cream was pretty easy to make. Just chop up some bananas, add some brown sugar and melted butter and then pop the whole thing in the oven to roast. I would advise checking it frequently. David Lebovitz suggesting roasting the bananas for 40 minutes, but mine were done in 30. So check frequently and stir often to prevent a whole different kind of burnt caramel!
This ice cream was so awesome, one family member told me that I should package it and start a line of low-fat, insanely tasty banana based ice creams. I don’t know if I’m going to do that (I think David Lebovitz might have something to say about it!), but it was exceptionally good. Especially if you are on a diet and looking for a fairly healthy treat. This is honestly as good as it’s going to get and frankly, better than many full fat ice cream flavors I’ve made.
Roasted Banana Ice Cream
Adapted from David Lebovitz’s cookbook, The Perfect Scoop, 2007.
Ingredients:
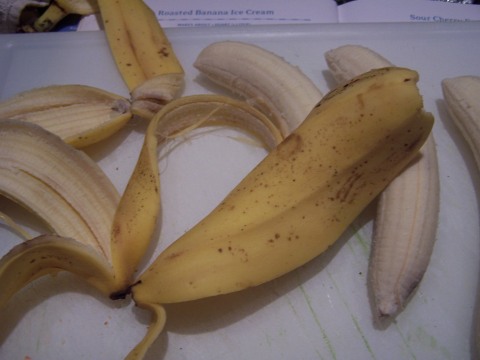
3 medium-sized ripe bananas, peeled
1/3 cup packed light brown sugar
1 tbsp. butter (salted or unsalted), cut into small pieces
1 1/2 cups whole milk
2 tablespoons granulated sugar
1/2 tsp. vanilla extract
1 1/2 teaspoons freshly squeezed lemon juice
½ tsp. coarse salt
1.) Preheat the oven to 400°.
2.) Slice the bananas into ½ -inch pieces and toss them with the brown sugar and butter in a 2-quart baking dish. Bake for 40 minutes, stirring just once during baking, until the bananas are browned and cooked through.
3.) Scrape the bananas and the thick syrup in the baking dish into a blender or food processor. Add the milk, granulated sugar, vanilla, lemon juice, and salt, and puree until smooth.
4.) Chill the mixture thoroughly in the refrigerator, then freeze it in your ice cream maker according to the manufacturer’s instructions. If the chilled mixture is too thick to pour into your machine, whisking will thin it out.
Make it a Sundae!- This would be a great ice cream to use in a banana split! Use three scoops of this with chocolate sauce, strawberry sauce and marshmallow. Add a split banana, whipped cream, toasted walnuts for crunch and a maraschino cherry on top. An updated and great twist on classic!
I’ve been making David Lebovitz’s Rice Pudding Gelato ever since I purchased his wonderful book, The Perfect Scoop, a year ago. It immediately jumped out to me because I love gelato and I particularly love this type of rice pudding that Scandinavians call Riskrem. Riskrem is rice pudding as you’ve never had it before and one of my all time favorite desserts. Part of what makes it so special is that freshly whipped cream is folded into the rice pudding, making it both decadent and light as a cloud. Combining my two favorite desserts is brilliant and this recipe captures the very best qualities of rice pudding and ice cream.
Part of what makes this ice cream so great is the way it’s prepared and its delicious flavorings. You bake arborio rice with milk, a whole split vanilla bean and some orange rind for an hour and a half until the rice is tender and deeply flavored. The milk infuses with the orange and vanilla flavors creating a rich and complex base.
Another genius aspect of this recipe is the fact that some of the rice gets put into a blender, creating little nubbly textured grains of rice. Texture is really important in almost all food and ice cream is no exception. With some grains of rice being left whole and some pureed fine, this ice cream has a delightful mouthfeel that’s a joy to eat.
Even if you’re not a rice pudding lover, do try this ice cream. I think it’s an improvement on the traditional rice pudding and the subtle nutmeg, vanilla and orange flavorings keep every bite delicious and intriguing. Another great ice cream from David Lebovitz! With him you just can’t go wrong.
Rice Gelato
Adapted from Perfect Scoop.
1/2 cup Italian Arborio rice
3 cups whole milk
3/4 cup sugar
pinch of salt
1 vanilla bean, split in half lenghtwise
Two 1-inch-wide strips of orange zest
5 large egg yolks (save the whites for use later)
1 cup half-and-half or cream
Pinch of freshly grated nutmeg
Preheat the oven to 350. In a 1.75 to 2 quart baking dish, mix together the rice, milk 1/4 cup of the sugar and the salt. Add the vanilla bean and strips of orange zest (I made the mistake of actually scraping out the vanilla, but it’s not really a mistake… it’s delicious.)
Cover the dish with aluminum foil and bake for 1 hour. Remove the rice from the oven and remove the foil. Stir in the remaining 1/2 cup sugar, then continue to bake the rice, uncovered for another 30 minutes.
Remove the rice from the oven a second time, remove the vanilla bean and orange zest and briskly whisk in the egg yolks at once. Then whisk in the half and half or cream and nutmeg.
Puree half of the rice mixture in a blender or food processor until chopped fine then stir it back into the cooked rice.
Chill the mixture in the fridge then freeze it in your ice cream maker according to the manufacturer’s directions.
Carrot Cake Ice Cream
Posted on: January 19, 2010
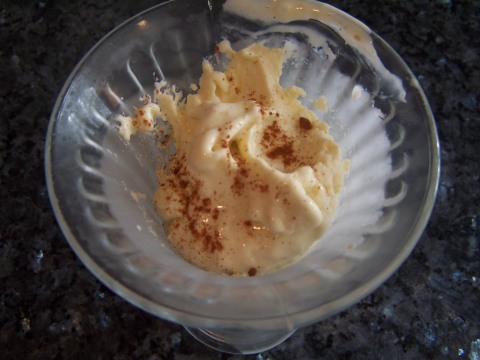
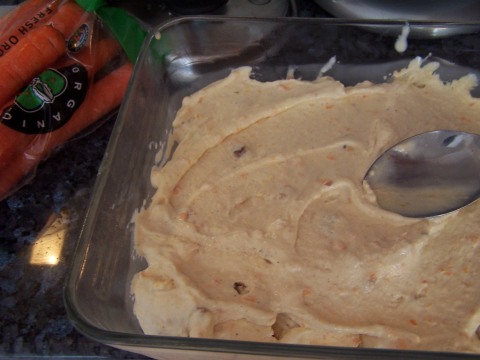
When I saw this delicious and inspired ice cream on the wonderful blog, Not Eating Out In New York, I knew I had to try it for myself. I’ve actually had Carrot Cake Ice Cream before at various ice cream parlors, and its alway been one of my favorites! It combines the best aspects of carrot cake and vanilla ice cream, creating a sort of carrot cake cake ala mode effect. With a flavor with the word “cake” right in the title, you might think this is just carrot cake pieces crumbled into vanilla ice cream. But this ice cream derives its flavor from a mixture of shredded carrots, brown sugar, spices, dried fruit and nuts to make the base of the ice cream itself taste just like the real thing.
The one way I deviated from the already brilliant recipe was that I added some cream cheese right into the base of the ice cream to mimic a cream cheese frosting flavor. This worked out really well! The cream cheese was subtle, but present, and added to the overall effect of eating a piece of carrot cake in frozen form. I even think it improved the texture and scoopability of the ice cream as it held up particularly well even after days in the freezer.
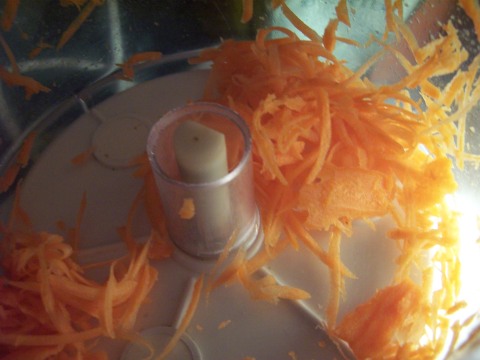
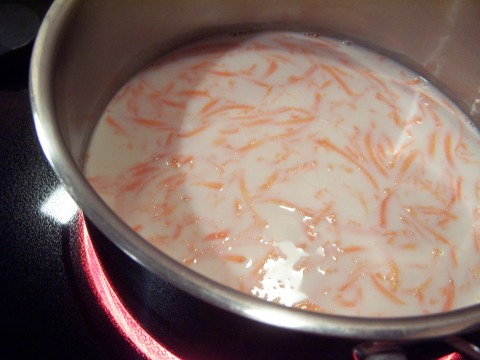
The hardest part of this recipe is probably simmering the carrots in milk for 20 or so minutes. It’s an extra step in comparison to the standard custard based ice cream recipe, but the results are completely worth it. The shredded carrots seep into the milk, creating a base that tastes of carrot cake in every bite.
This was definitely one of my best homemade ice cream flavors and a recipe I’ll be making again and again. If you love ice cream and you love carrot cake then making this recipe is a no-brainer. Try it alone, or better yet with a slice of real carrot cake!
As adapted from the blog “Not Eating Out in New York”
Carrot Cake Ice Cream
(makes about 1 quart)
2 cups whole or 2% milk
1 cup heavy cream
5 egg yolks
1/3 cup white sugar
1/4 cup packed brown sugar
1/2 cup packed shredded carrots
1/4 cup raisins
1/4 cup chopped walnuts or pecans
1/4 teaspoon cinnamon
1/8 teaspoon nutmeg
1/8 teaspoon ground ginger
1/4 cup well softened cream cheese
In a small bowl, beat the egg yolks with the sugars and spices until fluffy and the lighter in color. Set aside.
Combine the milk, cream, carrots and raisins in a medium saucepan. Bring mixture just to a boil, then reduce heat to very low. Let simmer, stirring occasionally, for 25 minutes. (Do not let boil.)
Whisk softened cream cheese in a large bowl until smooth. Set aside.
While beating the egg yolk mixture, pour in a small spoonful of the hot milk mixture and continue to beat. Repeat process with a larger spoonful, while beating, then repeat again, and again. (This will temper the eggs, so that they don’t cook lumpy.) Next, scoop all the egg yolk mixture into the hot milk mixture. Return heat to medium-low. Cook about 8-10 minutes longer, stirring frequently with a spatula to scrape all corners of the bottom of the pot. Do not let boil. The custard should be just thick enough to coat the back of a spoon, but have no lumps.
When custard is ready, take off heat and immediately whisk it into the the set aside bowl of whisked cream cheese. Whisk well until fully incorporated.
Let custard cool completely, then transfer to an airtight container and completely chill in the refrigerator at least 2 hours. Follow your machine’s instructions for churning length. Add the chopped nuts in the last minute of the churning process. Transfer ice cream to an airtight container and freeze for 2 hours to “ripen.”
Make it a Sundae!- Not Eating Out In New York also features a delicious looking cream cheese sauce that she pours over her carrot cake ice cream. This would make a delicious carrot cake sundae! If you want to make the sauce, omit the cream cheese in the ice cream recipe. Top with some candied or crushed pineapple and whipped cream. Enjoy!
Cream Cheese Sauce
(makes about 4 servings)
1/4 cup cream cheese
1 tablespoon milk
2 tablespoons confectioner’s sugar
1/8 teaspoon vanilla
Beat all ingredients together in a bowl until smooth in consistency.
Chocolate Sorbet
Posted on: January 14, 2010
I’ve always wanted to try chocolate sorbet. Most sorbets are fruit flavored, so I wondered if a chocolate flavored one could really be any good. Especially with the yumminess that is chocolate ice cream to compete with. But after making this amazingly flavorful sorbet, I’m happy to report that the two frozen treats are different, but equally good. Using water instead of milk products or eggs allows for a deep, dark chocolate flavor to shine through in a way that would be difficult in an ice cream. And the best part is that its devilish taste belies the sorbet’s angelic nutritional profile. So after a calorically packed holiday season, treat yourself to this sorbet guilt-free!
I used a recipe I found from a book called Pure Dessert by Alice Medrich. What intrigued me was its simplicity of ingredients and ease of preparation. It has essentially just three ingredients- cocoa powder, water and sugar. Can water really even be counted as an ingredient? And as for the preparation, it’s a quick, simple boil on the stove. The hardest part is probably the agonizing wait for the sorbet to become solid and ripen in the freezer!
The only thing to watch out for with this recipe is that you definitely don’t want to overcook your sorbet when it’s on the stove. You want to heat the cocoa-sugar-water mixture just until the sugar dissolves and no longer. You see, I’ve learned from this recipe that heat is the enemy of the flavorful cocoa powder. If you boil it too long, the cocoa will lose all of its chocolately intensity- definitely something to be avoided.
I had a family member on a diet who flipped for this recipe and couldn’t believe it wasn’t a wicked indulgence. It’s remarkably creamy for a frozen treat with no dairy products, and also holds up very well after days in the freezer. This is chocolate at its best; rich, unadulterated and distraction free.
Chocolate Sorbet
Paraphrased from Pure Dessert by Alice Medrich
1 cup (3.25 oz) cocoa
Scant 1 cup sugar
2 tiny pinches salt
2 cups boiling water
1/2 tsp vanilla
Combine cocoa, sugar, salt in saucepan and whisk in 1/2 cup boiling water to make a thick paste. Add the remaining water. Stir over medium heat just until tiny bubbles form at the edges of the pan. Don’t cook any longer, as the heat can damage the flavor of the cocoa.
Take the mixture off the heat and add the vanilla. Refrigerate until cold, at least 4 hours. Add the rum or vodka, if using. Freeze in an ice cream maker according to the manufacturer’s instructions. Harden the sorbet in the freezer for at least 3 to 4 hours.
Note: The flavor is so rich that you can substitute half of the water with milk.
Bananas Foster Ice Cream
Posted on: January 10, 2010
I never intended on making Bananas Foster Ice Cream. I had originally wanted to make Ginger Ice Cream, but that poor frozen treat came to untimely end, unfortunately. My ice cream curdled on me, and I was left with no more ingredients to start over with. So, thinking on my feet, I scrounged together the ingredients I had lying around in my kitchen and decided to make a Burnt-Sugar Banana Ice Cream. It sounds good right? Well, it was! And not only was it tasty, it ended up tasting just like Banana’s Foster, that decadent treat combining bananas, brown sugar and butter until caramelized. So in the end, I snatched victory from the jaws of defeat. Who needs Ginger Ice Cream anyway?
This ice cream was super simple to make. The hardest part was probably making the burnt sugar. You add some sugar and water to a medium pan and boil it until the sugar turns dark brown. That’s the trickiest part. Because if you take the caramel off the heat too soon, you’re left with plain old caramel, which is OK but not the flavor we’re looking for here. If you leave it on too long, you’ll end up with a black caramel which will leave your ice cream with a burnt, acrid flavor. Wait until the sugar has turned a dark brown color, with perhaps just a fleck of black beginning to appear. Then, take it off the heat immediately and pour in the cream. Don’t worry, with some practice you’ll get it just right. And you’ll be glad you did because burnt sugar ice cream of any kind is amazing!
This ice cream has only a few ingredients in it, just three if you really pare it down. But all of its simplicity the flavor payoff is phenomenal! Rich and delicious, like a great banana’s foster, only frozen. Try it with a bit of flaky sea salt for that salted caramel flavor.
Bananas Foster Ice Cream
Ingredients:
2 ripe bananas (the more brown spots, the better!), mashed
2 cups heavy cream
¾ cup sugar
½ teaspoon vanilla extract
1 tablespoon dark rum
1.) Add sugar to a medium saucepan and bring to a boil with about two tablespoons of water added in. Boil, without stirring, until the caramel turns a dark brown. You’re looking for a very dark caramel here, but you don’t want out and out burnt. If your caramel turns black and starts smoking start over; you’re ice cream will taste horrible if you use it.
2.) Once your caramel turns dark brown, quickly take it off the heat and add the cream. Don’t worry if it roils up and hardens, bring it back to the heat and it will dissolve completely.
3.) Add in the mashed up banana, rum and vanilla extract and cool until completely chilled. Churn in ice cream maker according to the manufacturer’s instructions.
Make it a Sundae!– This decadent ice cream hardly needs it, but you could take it completely over the top by adding a rum-caramel sauce, fresh whipped cream and toasted pecans. Now that’s a sundae!
The Lighter Side– You substitute half and half for the heavy cream for a less rich ice cream.
Maple Walnut Ice Cream
Posted on: January 2, 2010
I live in New England (hence the title of my blog) so I couldn’t get away with not including this timeless Vermont classic. Made from good, toasted walnuts and high quality maple syrup it’s just divine. Unfortunately, at most places you order Maple Walnut Ice Cream, the flavor is not so fabulous. To save money, most commercial versions of this flavor use the dreaded cloying and sicky-sweet imposter that is artificial maple flavoring. So even if you’ve tried Maple Walnut Ice Cream in the past and haven’t flipped for it, try this version at home. You’ll think you’ve been transported to a snow dusted Vermont sugar shack!
For this recipe I call for grade B maple syrup. This might be a little bit of a trick to find because most supermarket maple syrups are Grade A dark amber. What’s the difference you ask? Grade B has a darker flavor, with richer caramel notes. This intensified taste really helps in cutting through all of that cream and milk for a more pronounced maple flavor. I found my bottle at Trader Joe’s, but any other specialty food store or gourmet shop would probably carry it. It’s worth searching for, and also tastes great on pancakes, waffles and any other place you would typically pour on the maple syrup!
I also call for maple sugar in this recipe, for another boost of maple flavor. I found mine at my local grocery store, but I do live in New England. If you live in a part of country or world that doesn’t carry it, again try a specialty food store such as Whole Foods or your local gourmet shop. If all else fails and you still want to make the recipe, maple sugar is also readily available through online vendors.
This flavor was very successful, with the maple flavor really shining through the ice cream. Add a substantial portion of toasted walnuts and get ready for a delicious ice cream straight from snowy New England!
Maple Walnut Ice Cream Recipe
Ingredients:
1 1/2 cups heavy cream
1 1/2 cups whole milk
2/3 cup grade B maple syrup
¼ cup maple sugar
5 large egg yolks
pinch of salt
½ teaspoon vanilla extract
½ teaspoon maple extract
¾ cups toasted walnuts
1.) Combine milk and heavy cream in a medium saucepan and set over medium heat. Heat until bubbles appear near the rim of the saucepan and steam begins to rinse, but do not let it boil.
2.) Meanwhile whisk the egg yolks together in a large bowl and gradually add the maple sugar and maple syrup. Whisk the mixture until the yolks look fluffy and turns a lighter yellow color.
3.) All the while whisking the egg yolk mixture, slowly and gradually add milk mixture and when fully emulsified, pour the mixture back into the medium saucepan. Over low heat constantly mix the base with a spatula or wooden spoon until it thickens slightly and can coat the back of a wooden spoon, about 5-6 minutes.
4.) Immediately remove from heat and transfer to a large bowl. Add the pinch of salt and extracts and refrigerate 4 hours to overnight. Freeze according to your ice cream machine’s instructions. When ice cream is ready, add toasted walnuts. Enjoy!
Make it a sundae!
Make a Brazilian Sundae!! So good and unusual, I don’t know how this sundae got its name, but if the Brazilians did invent it they really know what they are doing! Start with a scoop of Maple Walnut Ice Cream, then add a scoop of Coffee and a scoop of Butter Pecan Ice Cream (either homemade or store bought ice cream is fine). Drizzle some caramel sauce spiked with rum and some cold chocolate sauce over it and top with fresh whipped cream and more toasted walnuts. A decadent taste sensation, and not to be missed!
The lighter side– Feel free to reduce the cream to ¼ cup and substitute all whole milk for the rest of the cream in this recipe. If anything it will only make the flavors more intense, which is the reason gelati is often made this way in Italy.


